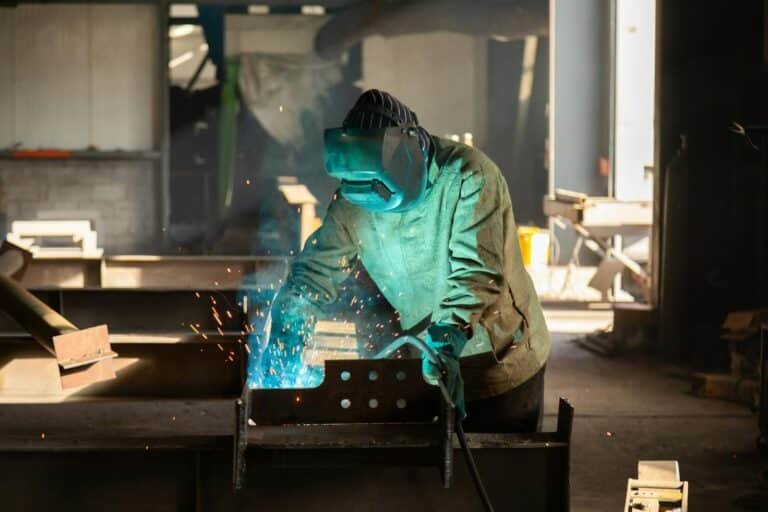
In the demanding world of mobile fabrication, construction, and remote repairs, your welder generator isn't just a piece of equipment; it's the beating heart of your operation. It provides the power, the precision, and the portability that keeps projects moving. But like any high-performance machine operating in often challenging conditions, it demands attention. This comprehensive guide delves into the essential Maintenance, Care & Troubleshooting for Welder Generators, transforming you from a user into a confident custodian, ensuring your investment delivers peak performance for years to come.
Neglecting your welder generator isn't just about risking a breakdown; it’s about jeopardizing your work. A poorly maintained unit can deliver "dirty power," silently damaging sensitive welding inverters, leading to weak or inconsistent arcs, and ultimately, costly downtime. The good news? Most catastrophic failures are entirely preventable with simple, routine checks.
At a Glance: Your Welder Generator's Vital Signs
Here’s a quick rundown of the critical maintenance points you absolutely need to know:
- Oil Levels Are King: Welder generators operate at consistently high RPMs, consuming oil faster than your car. Check levels daily.
- Air Filtration is Your Engine's Shield: Grinding dust is an engine killer. Clean your air filter weekly. A clogged filter chokes performance and wastes fuel.
- Fuel Hygiene Prevents Headaches: Stale fuel and clogged carburetors cause 90% of petrol "no-starts." Understand modern fuel challenges.
- Load Test Auxiliary Power: Before critical tasks, always test your auxiliary power outlets. A tripped breaker or blown fuse can waste precious time.
- The 10-Minute Weekly Check: Most major issues can be caught and prevented with just a brief, consistent inspection each week.
Why Proactive Maintenance Isn't Just "Nice to Have"—It's Non-Negotiable
Consider your engine-driven welder generator an expensive, critical asset. It's built to withstand tough environments, but it's not invincible. The very nature of its work – powering intense welding processes, often outdoors, exposed to dust, dirt, and varying temperatures – puts immense stress on its components.
Think of it this way: your generator's engine often runs at a fixed "high idle" (typically 3,000–3,600 RPM) for extended periods, unlike a car engine that cycles through various speeds. This constant, high-stress operation generates significant heat and wear, making diligent maintenance not just a recommendation, but an absolute necessity for protecting your investment and ensuring reliable power delivery. The difference between a welder generator that lasts 15 years and one that struggles to reach five often boils down to the consistency of its care.
If you're looking for more general information about these powerhouse machines, you might find our guide All about welder generators particularly useful for a broader understanding of their capabilities and types.
Your Daily Pre-Flight Checklist: Two Minutes to Peak Performance
Just as a pilot performs a pre-flight inspection, you should conduct a quick "pre-start" check on your welder generator. This two-minute routine can save you hours of frustration and potential repair costs.
- Fluid Levels First (60 seconds):
- Engine Oil: Your top priority. Pull the dipstick, wipe it clean, reinsert fully, then check the level. Welder generator engines consume oil at a higher rate due to constant high RPMs. Running low can cause catastrophic engine damage. Top up as needed with the manufacturer-recommended oil type.
- Coolant (if liquid-cooled): Check the coolant reservoir level. Low coolant can lead to overheating, which severely stresses engine components and can cause warping or cracking. Never open a hot radiator cap.
- Visual Scan for Trouble Spots (45 seconds):
- Walk around the machine. Look for anything out of place:
- Loose Wires: Frayed or disconnected electrical wires can cause shorts or prevent proper operation.
- Leaking Fuel Lines: A smell of fuel or visible drips indicates a potential fire hazard and fuel waste. Inspect hoses for cracks or brittleness.
- Frayed Belt Drives: Belts for cooling fans or alternators can fray or crack over time. A failing belt can lead to overheating or battery drain.
- General Debris: Clear any accumulated dust, dirt, or welding spatter from cooling fins and vents.
- Ensure Proper Grounding (15 seconds):
- Safety first. Always ensure your machine is properly earthed according to safety protocols and local regulations. A secure ground connection protects both the operator and the equipment. Look for intact ground leads and secure connections.
This quick daily ritual isn't a chore; it's a proactive measure that keeps your machine running smoothly and safely.
The Engine: The Beating Heart of Your Welder Generator
The engine is arguably the most critical component of your welder generator. Its reliable operation directly impacts the quality of your weld and the availability of auxiliary power. Focused maintenance here prevents the most common breakdowns.
1. Oil & Filtration: The Lifeblood Under Pressure
As established, welder generators operate at high, constant RPMs. This creates significant thermal stress on the engine oil, causing it to break down faster than in a vehicle.
- Change Interval: A general rule of thumb for engine-driven welders is to change the oil and oil filter every 100–150 hours of operation. However, always consult your specific machine's manual (e.g., Mosa, Shindaiwa, Lincoln, Miller, Kubota, etc.) for precise recommendations. Some heavy-duty diesel units might have longer intervals, while older or air-cooled petrol engines might require more frequent changes.
- Choosing the Right Oil: Use only the grade and type of oil specified by the manufacturer. Using the wrong oil can compromise lubrication, reduce engine life, and even void your warranty.
- The Oil Filter: A new oil filter should always accompany an oil change. It traps contaminants before they can circulate and damage engine components.
2. Air Intake: Breathing Clean in a Dusty World
Welding environments are notoriously dusty, often filled with metallic particles from grinding, cutting, and the welding process itself. Your air filter is the engine's first line of defense against this abrasive onslaught.
- The Danger of Dust: A clogged air filter starves the engine of oxygen, forcing it to run "rich" (too much fuel for the available air). This not only wastes fuel but also leads to "carboning up" of valves, reduced power, increased emissions, and premature engine wear. Grinding dust, in particular, is an engine killer if it bypasses the filter.
- Weekly Inspection: Inspect your air filter weekly, or more often if working in very dusty conditions.
- Cleaning & Replacement:
- For foam pre-filters, wash them in soapy water, rinse thoroughly, allow to dry completely, and lightly oil with engine oil before reinstallation.
- For paper elements, gently tap the filter on a hard surface. If a significant amount of dust falls out, it's time for a replacement. Never use compressed air on paper filters, as this can damage the filter media, creating microscopic holes that allow contaminants to pass through.
- Replace paper filters every 50–100 hours, or as recommended by the manufacturer, especially if they appear soiled or damaged.
3. Fuel System Hygiene: The Unsung Hero
The fuel system is often the source of "no-start" issues, particularly with petrol units. Modern fuel formulations present their own unique challenges.
- Petrol Units (E5, E10 Fuels): Today's petrol, especially E5 and E10 blends containing ethanol, readily attracts and absorbs water (it's "hygroscopic"). This water can lead to corrosion in the carburetor and other fuel system components, forming gummy deposits that clog jets and passages. This is why 90% of petrol "no-starts" are caused by stale fuel or clogged carburetors.
- Prevention: Use fresh fuel. If storing the unit for more than 30 days, treat the fuel with a high-quality fuel stabilizer, or better yet, drain the carburetor (see Storage Tips below).
- Fuel Filters: Regularly replace the in-line fuel filter to catch any contaminants before they reach the carburetor.
- Diesel Units: Diesel engines have different vulnerabilities, primarily water contamination and microbial growth.
- Water Separator: Most diesel units feature a fuel/water separator. This component is crucial for preventing water from reaching sensitive (and expensive) fuel injectors, which can be severely damaged by corrosion or rust.
- Weekly Draining: Make it a weekly habit to drain the water separator. There's usually a petcock or drain plug at the bottom of the filter housing. Open it until clean fuel flows out, then close it securely.
The Electrical Side: Where the Spark Happens
While the engine generates the mechanical power, the alternator (also known as the generator head) converts it into the electrical power you need for welding and auxiliary tools. If your engine runs but there's no "spark" at the rod, or no power from the outlets, the issue likely lies here.
- Brushed vs. Brushless: Welder generators can be brushed (using carbon brushes to transfer current to the rotor) or brushless (using induction). Understanding your type helps in troubleshooting.
- Brushes: The Conductors of Power (on brushed models):
- Inspection: If you have a brushed model and experience a weak or no arc, inspect the carbon brushes. They should be of adequate length and move freely in their holders. Worn-down brushes cannot make proper contact with the commutator or slip rings, interrupting current flow.
- Replacement: Replace brushes when they are worn down to their wear limit line. Always replace them in sets and use genuine manufacturer parts for optimal performance.
- Slip Rings: The Contact Surface:
- Condition: On brushed models, the slip rings (or commutator segments) are where the brushes make contact. Over time, these can become black, pitted, or grooved due to arcing and brush wear.
- Cleaning: If the slip rings are discolored or rough, they need cleaning. Use a specific "commutation stone" or very fine abrasive paper (1500+ grit) to gently clean the surface while the engine is running (exercise extreme caution, or preferably, with the engine off and generator head spun manually). Crucially, never use emery cloth! The metallic particles from emery cloth can embed in the windings and cause a short circuit, leading to severe damage.
Troubleshooting Common Issues: Getting Back to Work
Even with diligent maintenance, issues can arise. Knowing how to diagnose and address common problems quickly can save you significant downtime and repair costs.
| Problem | Likely Cause(s) | Fix |
|---|---|---|
| Engine hunts/surges | Clogged fuel filter; stale fuel; dirty carburetor | Replace fuel filter. Drain old fuel and refill with fresh fuel (add stabilizer if storing for long periods). If persistent, the carburetor may need professional cleaning or rebuilding. For diesel, check for air in fuel lines. |
| Weak or “Cold” Arc | Low engine RPM; worn brushes; loose connections | Check engine RPM with a tachometer (it should be at the specified high idle, e.g., 3600 RPM). If low, check governor settings or fuel system. Inspect brushes for wear and free movement, replace if needed. Check all welding cable connections (clean and tight). |
| No Auxiliary Power | Tripped circuit breaker; blown fuse; short circuit | Reset circuit breakers on the control panel. If it trips again immediately, disconnect all tools and test again; a faulty tool might be causing the short. Check fuses for auxiliary outlets; replace if blown, but investigate the cause of the overload. Inspect outlets for damage. |
| Engine dies under load | Blocked air filter; failing fuel pump; low oil pressure | Replace or clean air filter. Check fuel flow to the carburetor/injectors; replace or clean the fuel pump if it's not delivering adequate pressure. Check oil level and pressure switch (some units shut down if oil pressure is too low). |
| Engine Overheats | Low coolant; blocked cooling fins; faulty thermostat; restricted airflow | Check coolant level (if liquid-cooled), top up. Clean cooling fins on the engine and radiator of all debris. Inspect fan belt for tightness and damage. Consider a thermostat replacement if the engine consistently runs hot. Ensure adequate ventilation around the machine. |
| Battery Not Charging | Loose battery terminals; faulty charging system; dead battery | Check and clean battery terminals. Ensure they are tight. Inspect the alternator belt for tension and damage. Test battery voltage (should be >12.4V resting, >13.5V running). If running voltage is low, the charging system (alternator, regulator) may be faulty. |
| For persistent issues, especially those involving complex engine or electrical systems, don't hesitate to consult your machine's manual or a certified service technician. Sometimes, what seems like a simple problem can mask a deeper underlying issue. |
Smart Storage: Protecting Your Investment During Downtime
If your welder generator will be idle for more than 30 days, taking a few extra steps for storage can prevent significant headaches when you're ready to use it again.
- Drain the Carburetor (Petrol Units): This is paramount for preventing fuel-related issues. Turn off the fuel tap (if equipped), then run the engine until it completely dies from fuel starvation. This empties the carburetor bowl, preventing old fuel from gumming up jets and passages. You can also add a fuel stabilizer to the tank, run the engine for a few minutes to circulate it, and then perform the draining step.
- Battery Care: Cold weather and prolonged inactivity can kill a battery.
- Disconnect: Disconnect the negative battery terminal to prevent parasitic drains.
- Trickle Charge: Better yet, connect a smart trickle charger or battery maintainer. This keeps the battery topped up and extends its lifespan.
- Cover It Up: Use a breathable, waterproof cover. This protects the machine from dust, moisture, and UV rays. A breathable cover is important to prevent "sweating" (condensation) inside the machine, which can lead to internal corrosion of delicate alternator windings and electrical components.
- Lubricate Cylinders (Optional but Recommended): For long-term storage, remove the spark plug (petrol) or glow plugs/injectors (diesel), spray a small amount of fogging oil or engine oil into the cylinders, and manually turn the engine over a few times. This lubricates the cylinder walls, preventing rust and seizing.
Beyond the Basics: Pro Tips for Longevity & Value
Making maintenance a systematic part of your routine offers benefits far beyond simply preventing breakdowns.
- Keep a Logbook: This might seem old-fashioned, but a simple logbook detailing service dates, hours of operation, oil changes, filter replacements, and any repairs is invaluable. It helps you stay on schedule, tracks wear patterns, and significantly boosts the machine's resale value by demonstrating a history of meticulous care.
- Regular Load Testing: Beyond checking auxiliary power outlets, occasionally run your welder generator under a significant welding load. This helps ensure all systems are performing correctly and can reveal issues that might not appear under light load.
- Understand Your Manual: Your operator's manual is a treasure trove of specific information. It contains precise maintenance schedules, fluid capacities, troubleshooting charts, and safety guidelines tailored to your specific model. Refer to it frequently.
- Consider Professional Servicing: While DIY maintenance covers many bases, consider having a certified technician perform a thorough inspection and tune-up every 1-2 years, or after every 500-1000 hours of operation. They can spot issues you might miss and perform more complex diagnostics.
Your Welder Generator: A Partner, Not Just a Tool
A welder generator is more than just an engine bolted to an alternator; it's a partner in your craft, a testament to your mobility and capability. By embracing a proactive approach to maintenance, care, and troubleshooting, you're not just extending the life of your machine; you're safeguarding your productivity, ensuring reliable performance, and protecting your investment. Treat it well, and it will serve you faithfully, project after project.